

Your First Article
This guide takes you from a fresh install to your first generated article in under 10 minutes.
Don't have Raita yet? Download it from the member area.
Step 1: Log In
Open Raita. On the login screen, enter your email and password, then click Sign In.
If you don't have an account yet, click Create account and complete registration. You'll receive a confirmation email — click the link to activate your account.
Step 2: Create a Project
After logging in you'll see the Projects screen. Click New Project, enter a project name (e.g. "My First Project"), and click Create.
A project is a container for all your articles. You can have multiple projects for different websites or niches.
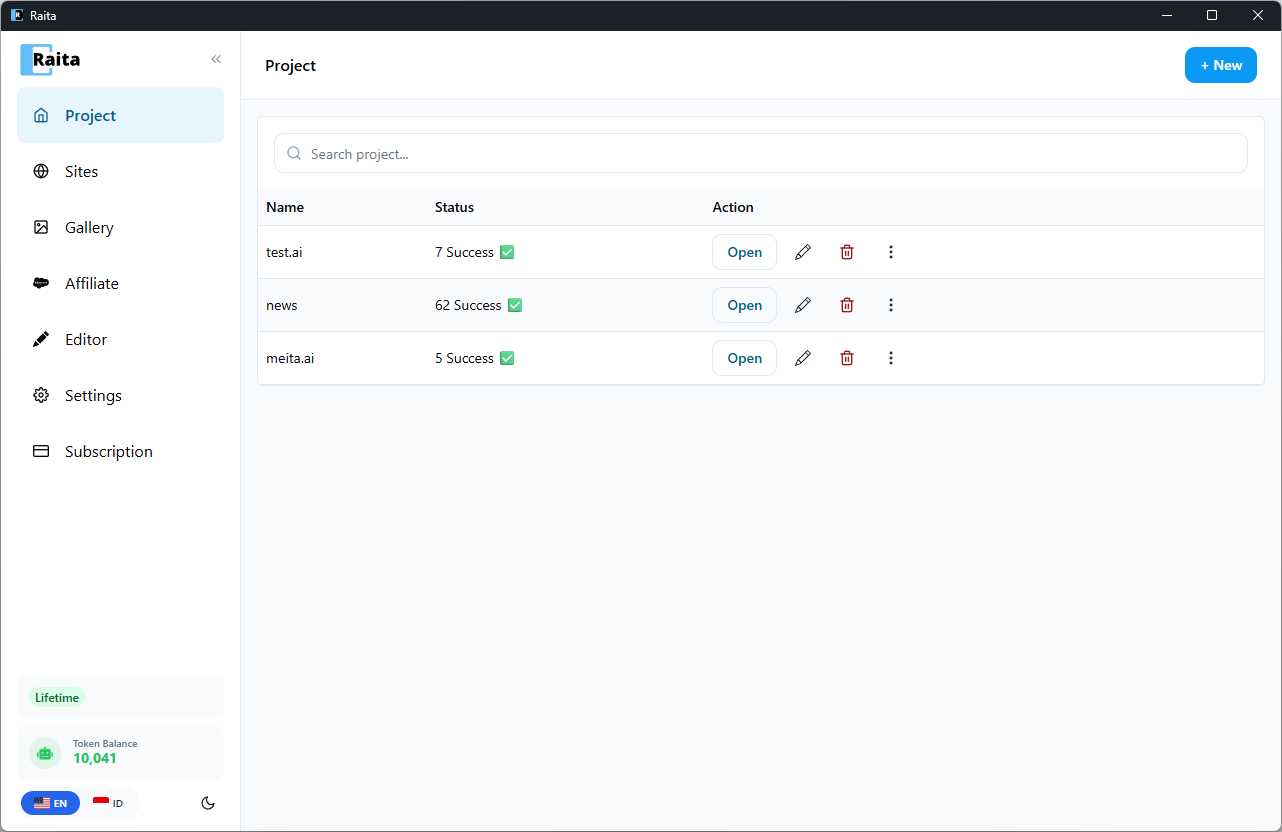
Step 3: Create Your First Article Worker
Click + New Task.
Fill in:
- Topic — what the article should be about (e.g. "best hiking boots for beginners")
- Niche — your site's topic area (e.g. "outdoor gear")
- Language — target language (e.g. "English")
Choose a starter template (Simple V4 is recommended) or enter a custom prompt in the Simple tab. Starter templates come pre-configured — just enter your keywords and go.
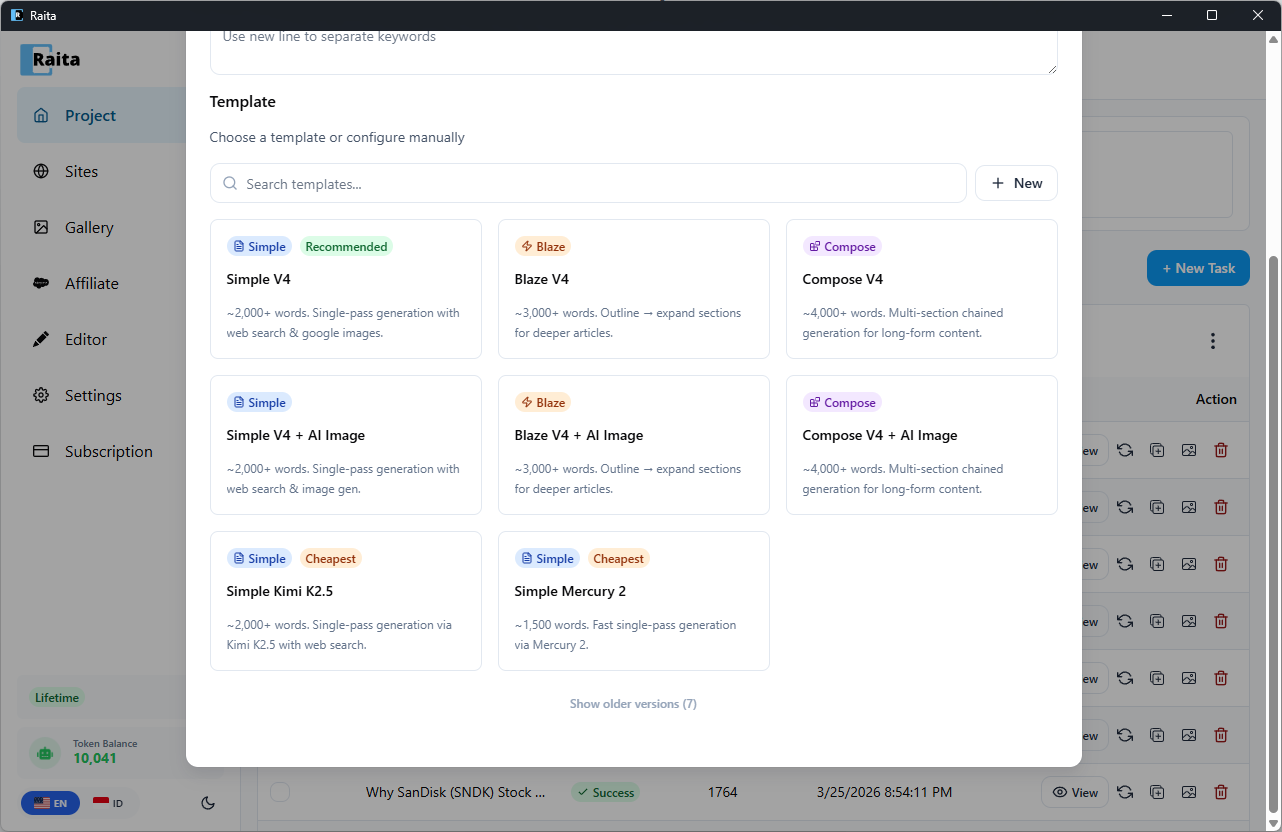
Click Submit to start generation.
Step 4: Wait for Generation
Your worker will appear in the articles table with status Pending, then Running. Generation typically takes 30–90 seconds.
When complete, the status changes to Success.
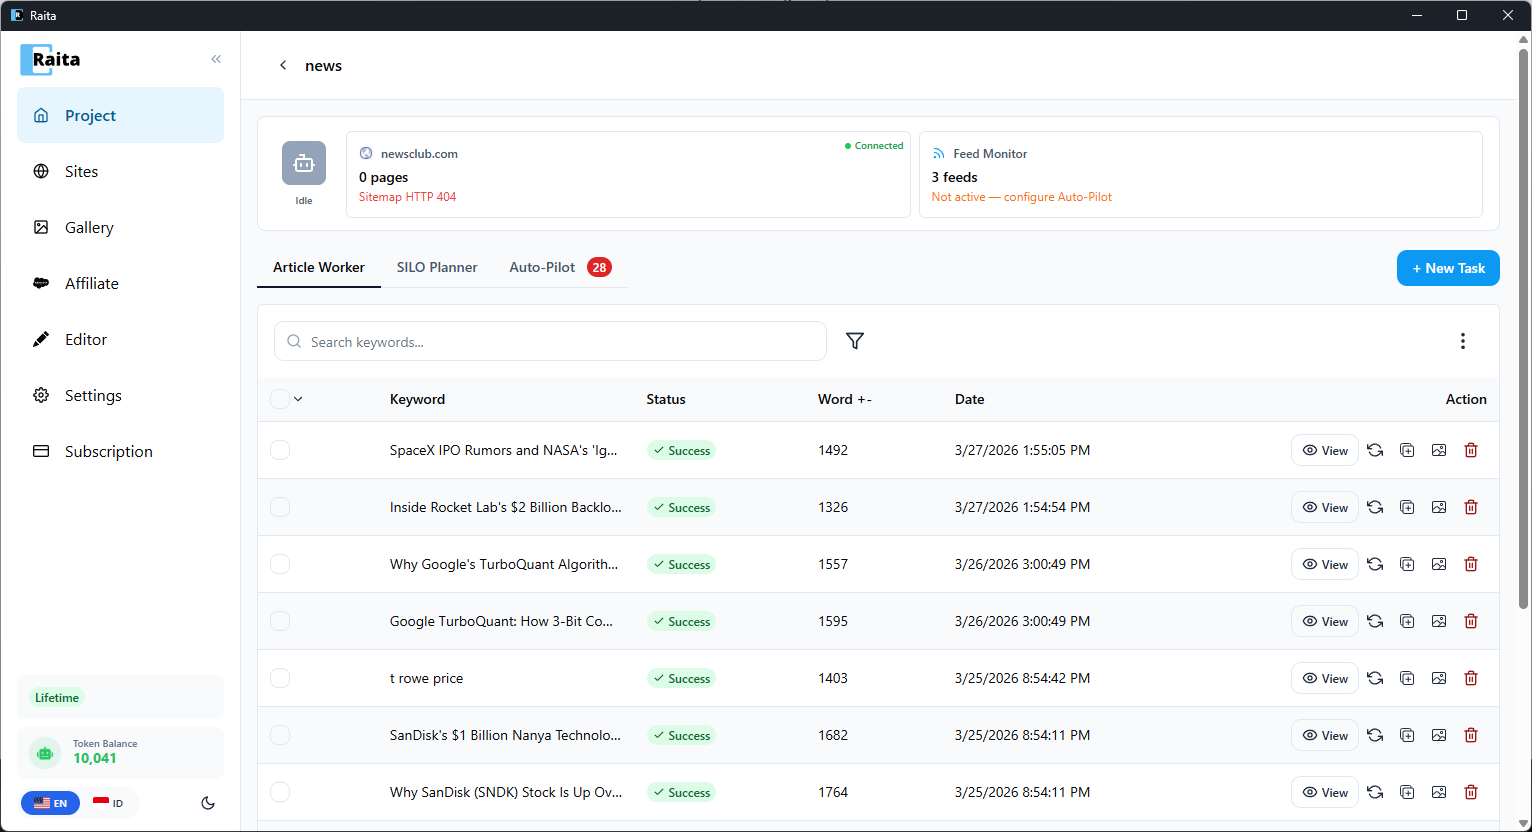
Step 5: Review the Result
Click the View button to open the article editor. You'll see the generated article with a rich text toolbar — adjust headings, formatting, and content as needed. Click Save when done.
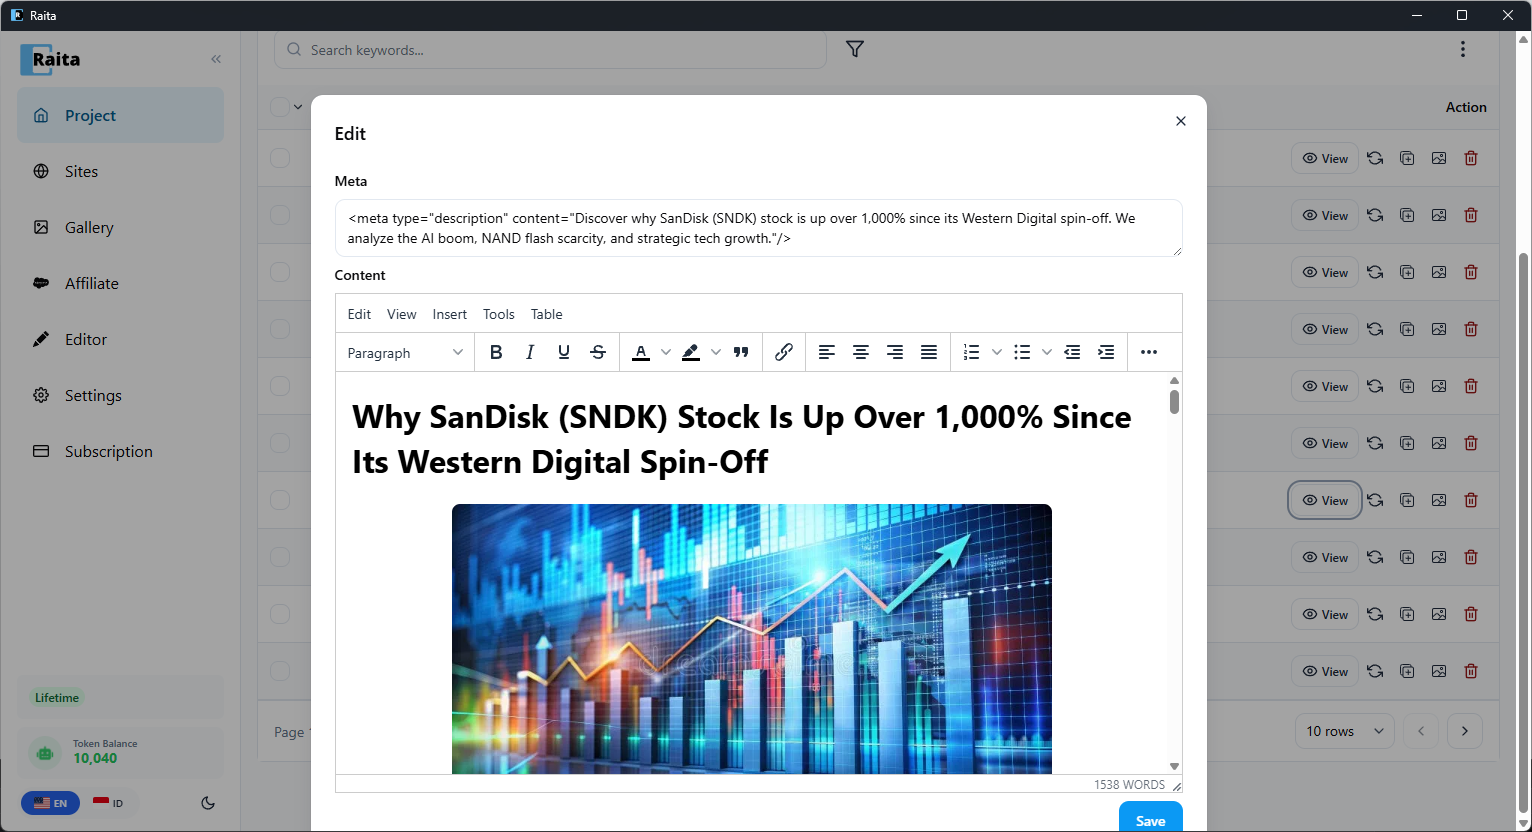
Step 6: Export
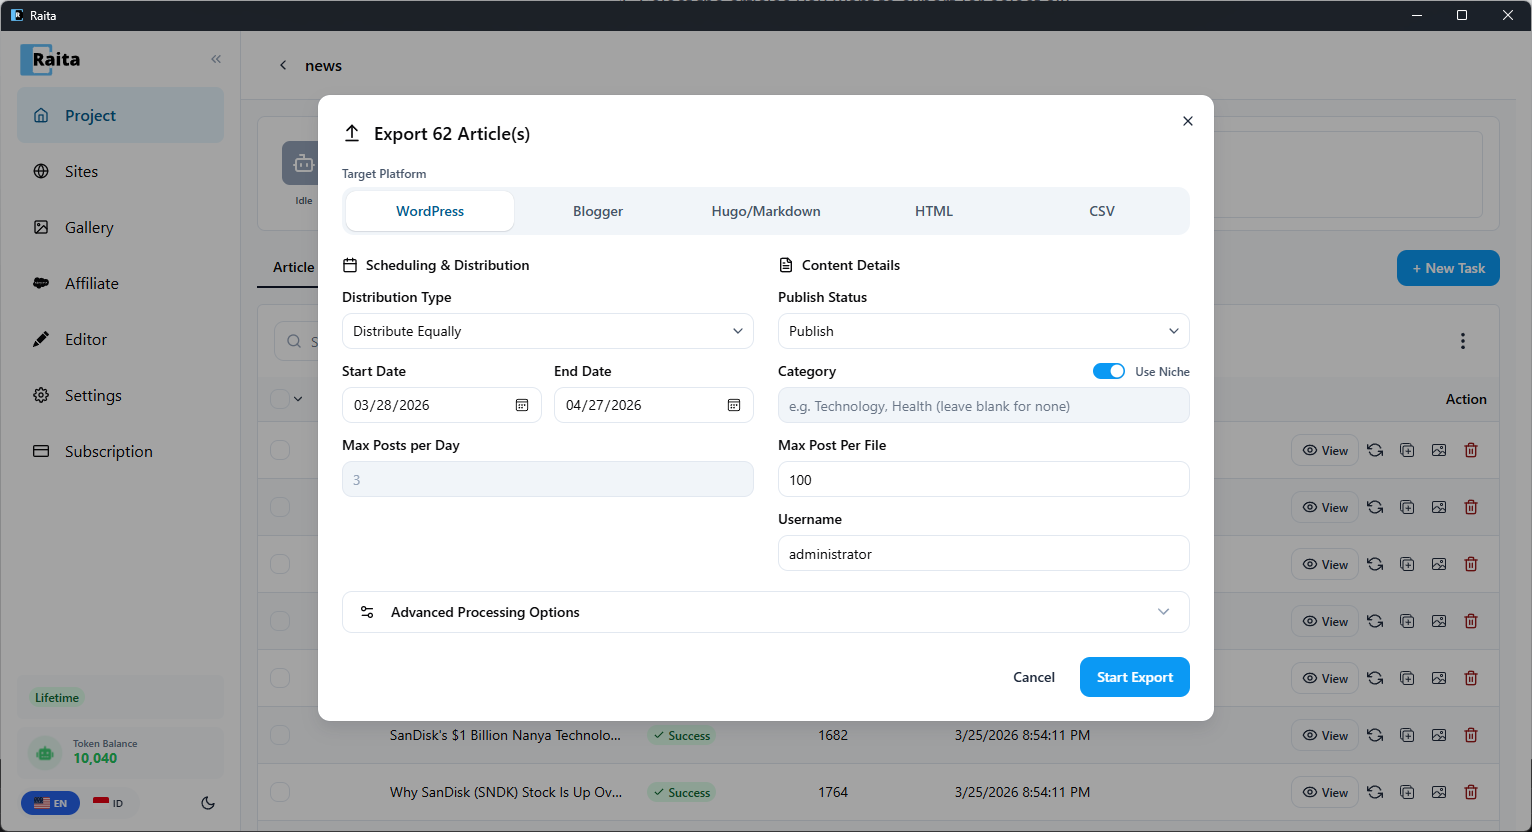
Use the ⋮ menu and click Bulk Export, or click the export button on an individual row. Choose a format:
- WordPress — import directly into WordPress via Tools → Import
- Blogger — Blogger Atom format
- Hugo/Markdown — markdown files
- HTML — standalone HTML file
- CSV — spreadsheet format
Configure scheduling and distribution options, then click Start Export.
Next Steps
- Learn about Blaze mode and Compose mode for more structured long-form articles
- Set up Auto-Pilot to auto-generate articles from Google Trends or RSS feeds
- Connect your WordPress site for direct publishing