WordPress Publishing
Raita supports two methods for getting articles into WordPress:
| Method | How | Best for |
|---|---|---|
| XML Export | Download a WordPress WXR file, import via WordPress admin | One-time or batch import without API setup |
| Direct Upload | Publish via WordPress REST API from Raita | Ongoing automated publishing |
Method 1: XML Export
- Select the articles you want to export (or select all)
- Click Export
- Choose WordPress XML
- Download the
.xmlfile
To import into WordPress:
- In your WordPress admin, go to Tools → Import
- Choose WordPress importer
- Upload the
.xmlfile - Map authors and click Submit
Method 2: Direct Upload (WordPress REST API)
Step 1: Configure Publish Settings
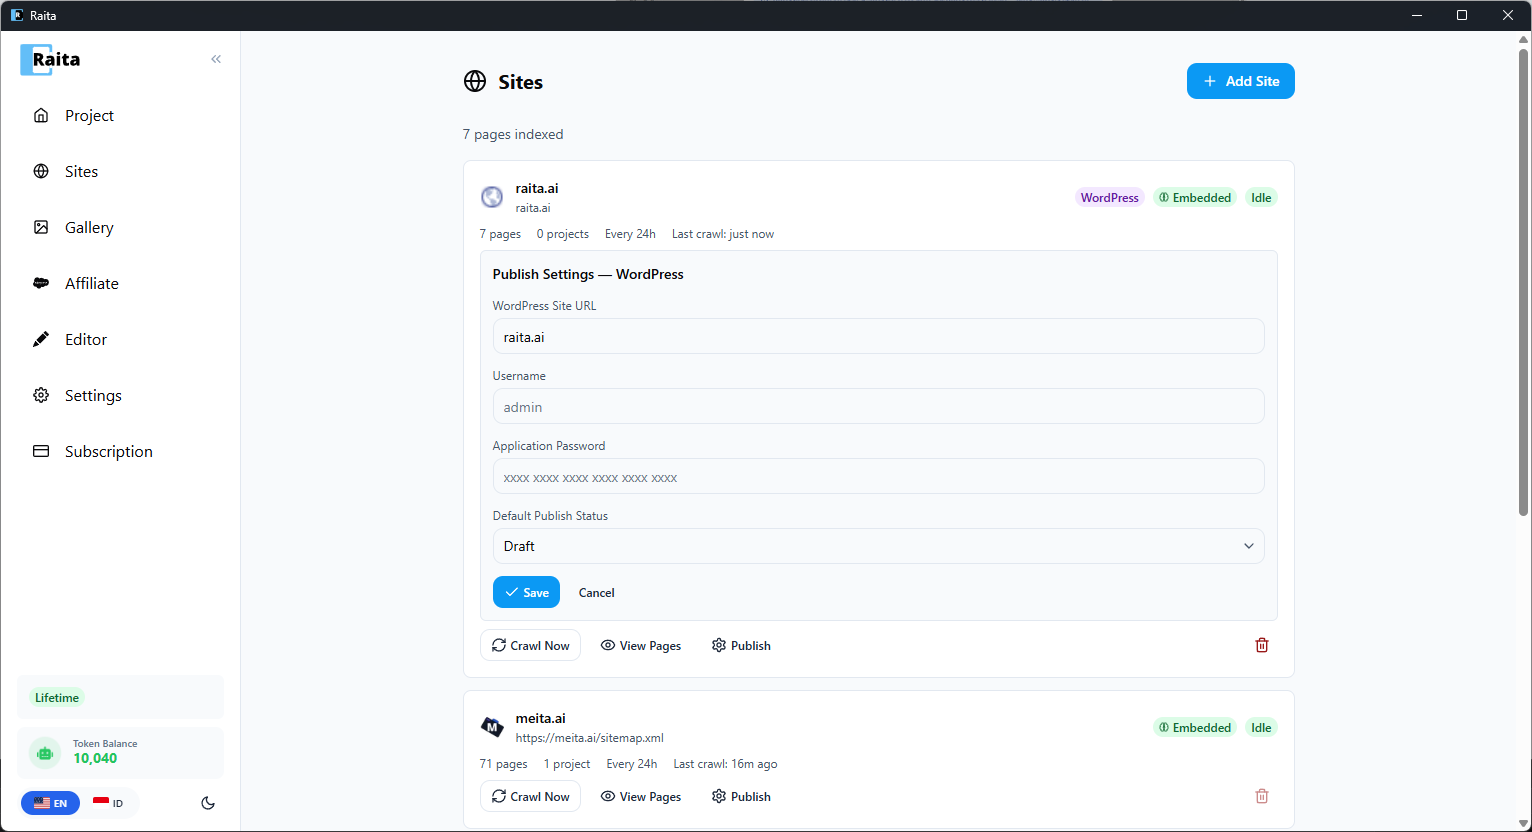
Go to Sites in the sidebar. Click on your WordPress site (or add one) and configure the Publish Settings — WordPress section:
- WordPress Site URL — your site domain (e.g.
raita.ai) - Username — your WordPress admin username
- Application Password — create one in WordPress under Users → Profile → Application Passwords
- Default Publish Status — Draft or Publish
Click Save.
Step 2: Upload Articles
- Go to your project and use Bulk Upload from the ⋮ menu, or click the upload button on individual articles
- Enter your site URL, Username, and Password (pre-filled if configured in Sites)
- Optionally enable Upload images to WordPress to push images to your media library
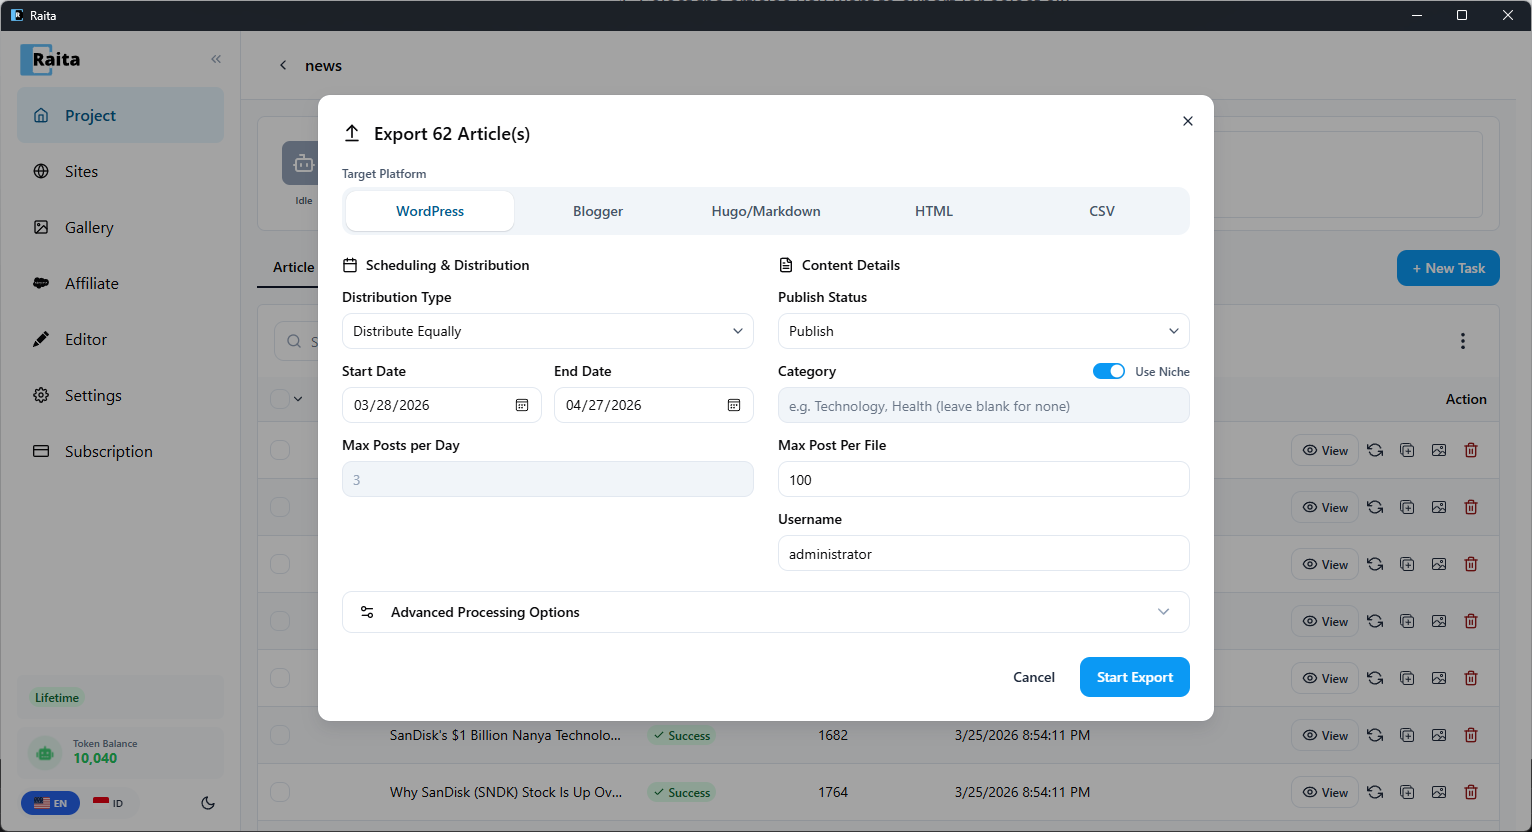
- Configure Scheduling & Distribution:
- Distribution Type — distribute equally or all at once
- Start/End Date — schedule posts across a date range
- Max Posts per Day — limit daily publishing rate
- Configure Content Details:
- Publish Status — Draft or Publish
- Category — assign categories (toggle "Use Niche" to auto-fill)
- Click Start Export

Tips
- Direct upload requires the WordPress REST API to be enabled (it is on by default in WordPress 5.6+)
- Use Draft status for review before publishing live
- If upload fails with a 401 error, double-check your application password